Sriracha Chicken

sriracha chicken recipe Brooke BurtonThis city has taught me a lot about food, but one of the most important food lessons came in the shape of a plastic bottle with a green cap and nozzle. Sriracha–a sauce created by a Chinese immigrant from Vietnam who relocated in Los Angeles–has flavors that are warm and spicy–like ketchup mixed with garlic and smoked jalapeno. It’s a magical sauce that can transform anything into something spicy good.

During those formative first few months in LA, I spotted the rooster sauce on restaurant tables all over LA–from the Mexican taco stand, late night diners, Chinese restaurants, and an all night Thai place in Hollywood where a Thai man with thick black hair dressed up like Elvis and sang between courses.

I was hesitant to try the spicy red sauce. Before I became a citizen of a multi-cultural city, I had never been exposed to a food city where Mexican, Guatemalan, Thai, Japanese, Korean, Chinese, and Middle-Eastern dishes could be found within miles of my home. I was brought up on simple foods and avoided spice wherever possible. But once I took my first taste of Sriracha sauce I was hooked. I bought a bottle at a Thai market not far from my home and began experimenting with it. Sriracha perked up my scrambled eggs, made the cheap frozen pizzas a I survived on more palatable, and took my Thai cooking up a notch.

In the years since my discovery, I have figured out a way to work Sriracha into many of my mainstay recipes, including sauteed kale, chicken banh micaramel pork banh mi, and edamame dip. So when one of the food-loving employees at the restaurant I consult at, told me a story about the Sriracha marinaded fish she cooked the night before, I got inspired. Rather than make my usual roasted chicken for dinner, why not make Sriracha chicken instead? Rather than making things complicated, I kept this recipe really simple. Continue reading “Sriracha Chicken”

Stretch Your Dollar, Foodbuzz 24×24

Homemade granola
One of Three money saving recipes that will help you stretch your dollar!

Nowadays, most people’s budgets don’t have much room for the extras, especially big luxury items. If you have things in your life that you want to save your pennies for–a new car, a big piece of furniture, a trip to a food blogging conference, or even fattening up your savings account–stretching your dollars in the kitchen is important. Since eating out seems like an impossible indulgence with your hard earned bucks, you need to get crafty with the way you approach your daily costs.

Being frugal doesn’t mean you have to stop enjoying yourself in the kitchen. As a matter of fact, I look at budgetary limitations as a formalized culinary challenge. I pretend I’m a participant on Iron Chef with the featured ingredient of NO MONEY! and see just how far I can stretch my menu with basic pantry items. I’ve found what works best for my budget menu planning is to keep two things in mind: 1) cook meals that can be eaten at any time of the day and 2) use simple pantry items as the base ingredients for dishes. When I cook a meal that can double as breakfast, lunch, or dinner, less time is spent in the kitchen and more time can be spent doing the things that need to get done.

Thanks to the great people at Foodbuzz.com, I’ve been given the opportunity to share with you a handful of easy recipes in this month’s Foodbuzz 24×24. My goal: help you save money so you can afford to do the things you want to do–like attend this year’s Food Buzz Conference in San Francisco. What’s even better, these three recipes make perfect road trip or airplane snacks so you can save your dollars at the airport when you’re flying (to San Francisco).

inexpensive granola recipe
Homemade granola

Oats

Oats are a perfect inexpensive pantry item that can double as a main ingredient for several meals during the day. Oatmeal for breakfast, granola for a midday snack, or even as the crumble for a dessert fruit crisp.

This granola recipe is an equally tasty but less expensive version of a previous granola I posted on this site several months ago. This is my favorite version of this recipe because it costs less and leaves me room to spend money elsewhere. I eat this granola dry, as a snack, and sprinkle a handful over Athena’s Greek Yogurt for a decadent breakfast, lunch or dinner. Oh, and the granola is great over ice cream, too!

Chef’s tip: Use the left over oats to make oatmeal for breakfast the rest of the week.

[print_link]

Apricot and Coconut Granola

Adapted from a recipe from Deliciously Organic

1 cup whole cane sugar (I used Trader Joe’s organic evaporated cane sugar)

3 oz organic maple syrup

3 oz organic agave syrup

4 cups rolled oats

1 ½ cups coconut, unsweetened

1 cup dried apricots, chopped

1/2 cup dried cranberries (or other dried fruit)

Optional: generous pinch of salt

Preheat your oven to 350º. Adjust the top rack to the middle of the oven. Whisk sugar, syrups, and a pinch of salt in a small saucepan over medium heat until almost smooth. In a large bowl pour syrup over the oats and coconut*. Stir gently with a wood spoon until it is completely mixed throughout. Pour mixture onto a sheet tray covered with parchment paper. Bake in the oven for twenty minutes, or until almost golden. Remove from oven. Let cool. Add dried fruit after you break up the granola into loose bits and large pieces. Enjoy immediately or store for later use.

Can be stored in an air-tight container for several weeks.

*if you don’t want your granola to be too sweet use less of the sugar/syrup mixture.

Egg and potato Frittata recipe
Potato and Egg Frittata aka Spanish Tortilla

Eggs

I don’t know if you’ll agree with me on this, but having breakfast for dinner is just downright fun. So when I asked Adam C. Pearson, my rock star food stylist friend, what kind of egg dish he would recommend I make for this budget post, he suggested I make a Spanish Tortilla. Turns out this dish–which took some explaining for me to understand that a Spanish Tortilla is basically an egg and potato frittata that’s served room temperature and sliced like a pie–is a perfect any time meal. This simple dish is a perfect thing to slice up, drop into a zip-lock bag and take to the office (or to the airport).

[print_link]

Potato and Egg Frittata aka Spanish Tortilla

Contrary to the sound of it, a Spanish Tortilla doesn’t actually have any tortillas in it whatsoever–just eggs, potato and any other tasty ingredients you care to add.

6 medium potatoes, diced

1 large onions, thinly sliced

*1/4 cup diced ham (or 2 slices of thickly cut bacon, diced)

1/4 cup milk

8 eggs

Salt and Pepper to taste

2 tablespoons butter

2 tablespoons vegetable oil

Directions

In a large bowl, mix the potatoes and onions with a pinch of salt. Heat 2 tablespoons of butter in a large non-stick frying pan. Fry the potatoes and onions on low heat. Cover with a lid for 5-10 minutes to let them soften. Turn up the heat for another 5 minutes, or until golden brown. Remove from the stove.

Meanwhile, break the eggs into a medium bowl. Add a pinch of salt and milk. Whisk until frothy.  Add the potatoes and onion mixture to the eggs and mix well.  Using a clean frying pan, heat the oil on a high heat. Pour in the egg mixture, move it around in the pan to help the eggs to rise. Fry until the bottom begins to brown. Being careful not to burn yourself, place a large plate over the top of the sauté pan so that you can flip the frittata. Slide the uncooked side back into the pan to cook the entire tortilla for another minute or two. Turn off the heat and let set in the pan for a few minutes. Serve sliced with green salad.

Chef’s tip: The extra 2 eggs can be used with a previous scheduled meal. Add a fried egg to a pizza, a hamburger, or a bowl of fried rice and suddenly you’re eating a luxury meal. Drop an egg into a bowl of simple chicken stock and you’re eating like an Italian Grandma.

*This dish is simply wonderful without the pork, but it certainly gives this dish plenty of great flavor. If you can’t find an affordable ham steak at your butcher’s counter, you can substitute the ham with diced bacon, which can be cut to order into two thick slices (so you don’t have to buy an entire package of sliced bacon) and kept at a reasonable cost.

butter lettuce turkey sausage pasta
Butter Lettuce and Turkey Sausage Pasta

Pasta

Pasta is one of the main bargain meal staples in most homes. No matter what you’re upbringing, you probably have a pretty good idea how inexpensive pasta can be when creating a satisfying meal. You don’t need to resort to jarred sauces or powdered cheese to create an inexpensive pasta dish, though. As a matter of fact, some of the most delicious pasta dishes can be made with just three ingredients.

This pasta dish’s unique ingredients makes for an exceptional meal that won’t taste like a re-hashed meal or yesterday’s leftovers.

Chef’s Tip: This dish is great warm or served cold. Transform any leftover lettuce you have on hand into a salad.

[print_link]
Pasta with Leeks and Turkey Sausage

Modified from a recipe from Martha Stewart

1 box of pasta (shells or twists work best)

1 lb of turkey sausage

3-4 leeks, white and light-green parts only, halved lengthwise, cut into 1/4-inch slices, rinsed well, and drained

1/4 cup dry white wine

2 tablespoons butter

1 head of butter (bibb) lettuce, washed and torn into pieces.

Course salt and Pepper to taste

Grated Parmesan, for serving

*Reserve one cup of pasta water

Directions

Bring to a boil a large pot of salted water for pasta.

Meanwhile, in a large skillet, cook turkey sausage over medium-high heat. Break up the meat with a wooden spoon until browned, about 5 minutes. Add leeks to the skillet and cook until softened, 5 minutes. Add wine and cook, stirring frequently, until mostly evaporated, 2 minutes. Stir in butter and season to taste with salt and pepper.

When pasta water is at a rolling boil, cook pasta according to package instructions. Reserve 1 cup pasta water. Drain pasta and return to pot. Add the sausage and leek mixture. Toss gently to combine. Add the torn lettuce (use no more than 3-4 cups of torn lettuce) to the pasta with enough pasta water to create a “light sauce” that coats the pasta. Toss. Serve with Parmesan on the side.

I hope you’ve found some inspiration and useful advice that can help you use a handful of basic pantry items to stretch your budget, please your palate, and make you feel like you’re not skimping.

Most Improved

chicken broth poached egg recipeIt was the summer between my junior and senior year and I was away at a summer youth music school. My parents were getting a divorce, my home life was a mess, and I was happy to spend almost two months with other kids my age focusing on the one thing I really loved: music.

I spent the summer working hard on my vocal performance. I auditioned for groups and tried out for the privilege of private lessons. I didn’t make the special chorus but I did qualify for one-on-one sessions with a vocal coach. I was excited. I was going to grow as a performer.

By the end of the summer I had learned more than I had ever bargained for. I even fell in love. On the last day of camp, hundreds of students and teachers gathered in an auditorium at the University of New Hampshire for a final ceremony.

I wore a loose tee shirt and a jean skirt as I sat in my seat feeling butterflies. I desperately hoped I’d be given an award. I wanted something to prove to the world around me that all of my hard work that summer was good. Really good.

Despite the fact I had rather low self-esteem, I did feel with some certainty that I would get an award. I just knew I had achieved something great. I had matured as a young woman, a student, and as a performer. But as the awards ceremony stretched out, I started to doubt my intuition. Hadn’t I proven my commitment and my passion for music?

Near the end of the awards ceremony, when it seemed as if all the awards had been handed out, the chairwoman of the vocal department stepped up to the podium. She cleared her throat before reading some handwritten words from a small note card.

“And lastly,” she said, “we have an award for this one very special person who worked hard, was committed to learning, and grew in leaps and bounds…The award for most improved singer of this year’s Summer Youth Music School is Brooke Burton.”

“The Most Improved” Award? I sat in my seat completely dumbfounded. I was struck by the thought that maybe the faculty had created the prize in a last minute show of pity. The self-loathing teenager I was–the person who told herself that her body was too square to be attractive and that the deep tone of my contralto voice was too manly–became undeniably uncomfortable in this long hoped for moment. I began to sweat through my tee.  I was terrified.

Someone elbowed me to go up and take the award. I could barely feel my feet underneath me as I walked up to the stage. That’s it, I thought to myself. Now everyone knew the cold, honest truth. I was a terrible singer, only made better by a lot of hard work.

I felt humiliated by the award. Because when you’re seventeen years old and full of self-doubt, humility and pride is a hard thing to come by. Humiliation is what shows up, trucked in by the dumpster.  “I guess I really sucked,” I said when I got back to my seat. I said it because I half believed it and also so that that person sitting next to me wouldn’t say it to me first.

Continue reading “Most Improved”

Kitchen Love Letters

A wonderful thing happened. My husband started cooking.

The change came about a month ago. It began with breakfast. While I dressed for work he’d slip into the kitchen and brew a pot of our favorite organic coffee and construct a delicate egg white omelet with spinach and goat cheese. When I emerged from the whir of my early morning rituals—hair drying, make up application, multiple outfit changes—I’d find a folded cloth napkin, a perfectly doctored coffee, and a plate of comforting food waiting for me. On mornings when our window of time together was brief, he’d surprise me with a thick slice of bread dripping with melted butter and apricot jelly. I barely had time to notice he had perfected the careful balance of sweet and savory in the fruit smoothies he’d slip to me as I headed out the door.

I started to see a pattern of culinary devotion as he began adding lunches to his repertoire. Rather than visit our usual neighborhood lunch spot, he’d serve us decadent open-faced turkey burgers he grilled that were draped in a blanket of melted cheese or a thick slice of over-ripe persimmon. He’d peel an orange and have it waiting for us when we found ourselves at that inevitable point of the meal when we started to crave something sweet.

Then came dinners. I marveled at his grilled fish on a bed of Israeli couscous with thinly sliced lemons. On another night, he sautéed perfect squares of halibut with a spiced rub and a spicy yogurt sauce with fresh mint. Then there was the time he roasted a whole bird he bought at the farmers market with muddled fennel seeds and thyme.

After those meals his kisses never tasted sweeter.

With my husband at the helm of our kitchen, I’ve begun to relish the stacks of dirty mixing bowls or the skillet that needs a good soak. Because with every food-stained plate comes a piece of the story of what he learned in the kitchen.

I didn’t think it was possible, but every culinary tale makes me love him a little more. Continue reading “Kitchen Love Letters”

Jook, Love at First Bite (a Project Food Blog Entry)

Project Food Blog congee
Project Food Blog's Second Round Entry

When you move to Los Angeles from small town USA, the culture shock is great. The weather, the cultural diversity, the dominance of the entertainment industry, and the abundance of revealing clothes is all quite astonishing. What’s more, if you want to know anything about food and are curious by nature, every day in Los Angeles can be an opportunity to move outside of your culinary comfort zone.

For this week’s Project Food Blog Challenge (more about that in a bit), the contestants were asked to create a classic dish from outside their comfort zone. What better dish to make than Jook, a rice porridge comfort food from a culinary culture I know very little about.

I first learned about Jook from Jonathan Gold, one of our city’s most famous culinary journalists (and the only winner of the Pulitzer for food writing). Gold is what you’d call L.A.’s poster boy for strip-mall ethnic food. His craft for sculpting words and ability to describe uncommon meals in the most mundane locations has created something of a culinary fad where LA food lovers seek out the most unusual, ethnic eats across the city in our city’s trashiest of locations.

All this is to explain how it came to be that this white girl from Massachusetts has been craving a Korean comfort food I’ve never even tasted before.

The first bite is the greatest

Rice porridge, or Jook in Korea, Congee in China, Okayu in Japan, is a popular comfort food throughout all of Asia. Known for its restorative powers for both the sick and the hung-over, the slow-cooked rice dish is a savory oatmeal that’s eaten for breakfast, a late night snack, or during the lean times. Jook is a creamy porridge that’s both comfort food and a kind of blank canvas for all sorts of great flavors and textures. Slow simmering short grain rice for several hours in water or chicken stock results in a creamy pap that is the perfect food delivery device for the flavors and textures of sesame oil, fish sauce, crunchy pickles, spicy condiments, herbs, meat, seafood, and even a fried egg.

Eating a dish for the first time on a very empty stomach is often the best way to imprint a taste in your memory. I’ll never forget that crusty French bread slathered with rich butter that time I was a starving student in Paris. Nor will I ever forget the flavor of Congee after a day of shopping at the Korean market and rushing around to be ready in time for this Project Food Blog Challenge.

But oh! The jook! It was just beautiful the way the soft fried egg oozed onto the porridge. Or how the sesame oil pooled onto my spoon with a drop of salty fish sauce, creating a fishy vinaigrette. And the salty crunch of the bacon and pungent hit of chopped scallion gave every bite a satisfying texture. The soft porridge is the kind of comfort food that–regardless of your cultural heritage–you immediately want to adopt once you’ve tasted it.

Continue for the easiest Congee Recipe Ever! »

Caramel Pork Banh Mi

how to make pork banh mi

Certain foods elicit recollections of childhood, others conjure up the essence of loved ones. Rare though, is a flavor so particular and influential, the act of consuming it has the power to alter the course of the eater’s life. Turning point foods are those that not only evoke an eater to remember, it defines the eater. So it is for me with Banh Mi.

I never expected a spicy Vietnamese sandwich called Banh Mi, would have the power to delineate my life. And yet, the simple and ultimately complex sandwich—the result of a tumultuous relationship between the French and the native Viets—has lead me to a whole new culinary realm and brought me significant friendships I will cherish forever.

My first taste of Banh Mi was a wake up call from the fiery spirit of a Vietnamese muse. I was living in New York City during a sweltering summer and working as a General Manager and consultant for a soon-to-open restaurant under construction in the Lower East Side. Despite the fact that I was new to the vibrant city, and lived in the heart of a new food mecca (Katz’s Deli, Russ and Daughters, Stanton Social), I lost myself to 16-18 hour work days. Rather than cherishing the opportunity to experience a new city, I poured myself into every passing minute at the restaurant. I was missing everything.

That’s when Banh Mi stepped in to kick my ass.

Continue for the full Vietnamese Caramel Pork Banh Mi Recipe »

Think Like A Chef: Quinn Hatfield

cake tester from Quinn Hatfield

I’m lucky to have chefs for friends. It’s one of my most favorite benefits of working in the restaurant business. Not only are professional cooks really entertaining to hang out with* they also are invaluable resources when it comes to anything culinary. And, if you ask nicely and aren’t afraid to embarrass yourself, chefs have lots of great insights on cooking techniques, recipes and how to improve your performance in your home kitchen.

Chef Technique

mise 1

In order to cook like a chef you have to think like one. In a professional kitchen, cooking isn’t done on a whim. Everything is thought out in advance and prep–small tasks like shelling beans, peeling potatoes and making stock–is done before the first diner ever walks through the restaurant’s front door. The chaos of a busy kitchen is powerful enough to ruin any chef–regardless of their training and stature–if they haven’t properly organized, planned and maintained great technique.

Thanks to several recent off-the-clock visits with the chefs of Hatfield’s restaurant, I’ve been able to pick up a lot of great ideas I frequently use at home. Beyond learning about the best inexpensive kitchen tools, I’ve also been able to pick up some key cooking techniques. The following recipe is a great example of how learning an invaluable and time-tested cooking technique can make cooking at home so much easier.

Thanks to the generous guidance of my Michelin starred chef friend, Quinn Hatfield, I now am pretty certain how he makes Alaskan halibut taste so good. This recipe is a slightly modified version of a dish I recently tasted Hatfield’s.

Alaskan Halibut can be sublimely sophisticated when good planning, preparation and technique are employed. Advanced prep is the key to creating this elegant entree without ever breaking a sweat.

Before you start, read the recipe through from beginning to end

Rather than cook as you go, think about meal preparation as a two part process: prep and then cooking. Preparing dish elements in advance is an adjustment, but with all the chopping and complicated busy work taken care of in advance, there’s a lot less stress in the kitchen at dinner hour.

Hatfield's at Home

[print_link]
Crusted Alaskan Halibut with Shrimp Mousseline and Spring Vegetables**
Makes 4For the fish:
4-6 oz. halibut fillets with skin removed (Check for pin bones. Remove with tweezers, if necessary)
1 small loaf of brioche (to be frozen in advance of prep)
shrimp mousseline (see ingredient list below)
parsley butter (see ingredient list below)
Maldon sea salt

for shrimp mousseline
8 medium to large shrimp, with shells removed and de-veined
¼ cup heavy cream
1 small clove of garlic

for parsley butter
6 tbsp of butter, room temperature
¼ (heaping) cup of parsley leaves (removed from stem)
1 small clove of garlic
salt and pepper

Spring vegetables

3/4 lb of mixed spring vegetables (baby carrots, baby zucchini, baby pattipan squash)
6 sprigs of thyme
4 tbsp butter or olive oil
salt and pepper
Maldon sea salt

Tools needed: metal cake tester, wax paper, pastry brush, steamer, mini-Cuisinart (or blender), mandoline (inexpensive plastic version can be found at Asian markets or at cooking stores like this.

Mise-en-place (can be done several hours in advance):

Cut brioche in half. Freeze the bottom half and save the rest for another use. When the bread is completely frozen, remove the crust and slice the bread into rectangular strips that mirror the shape of the fish fillets. Keep in mind you will only need to slice enough bread to create a single layered “crust” for each fillet. Slices should be no thicker than 1/8th of an inch. Line a sheet tray with a sheet of wax paper then add the brioche in a single layer. Cover with clear plastic and refrigerate.

To make the mousseline:
Place the cleaned shrimp, cream and garlic in the bowl of a mini Cuisinart. Purée until mixture is thick like a paste. Remove from bowl with a spatula and refrigerate in a covered container.

To make the parsley butter

Clean the Cuisinart’s bowl. Add butter, picked parsley leaves and garlic. Purée until smooth. Temper the butter over a low heat in a small saucepan or non-stick pan. When tempered, remove the brioche slices from the refrigerator. Spread parsley butter onto one side of bread. Flip the bread (butter side down) on the wax paper. Save remaining scallion butter for bruschetta or buttering bread.

Fish prep:

Spread a thin layer of mousse on the fish with the back of a spoon. When finished, salt and pepper both sides of the fish. Using the shrimp purée as a sort of glue, flip the fish (mousseline side down) onto the unbuttered side of the brioche bread.Cover with plastic wrap and refrigerate until ready.

composing the fish

45 minutes before serving time:

Remove sheet tray with prepped fish. Carefully flip the fish so that the wax paper is top side up. Cut around the wax paper so that each fish has wax paper covering its bread crust.

Add several inches worth of water to a pasta/vegetable steamer. When steamer has begun producing steam add the prepared fish, keeping the covered crust facing up. Do not crowd the fish. Crack the lid with a spoon, making sure the lid is tilted at an angle—otherwise the condensation will make the bread soggy.

Let the fish steam for 20 minutes. Carefully remove one piece of fish with a spatula. Using the cake tester to check the done-ness of the fish, insert the thin metal pick into the fish horizontally so that the tester hits each of the fish’s internal segments. If you feel the ping-ping-ping of the connective tissue, the fish will need more time to cook. Return to steamer. When the cooking is complete, the connective tissue will be buttery smooth and can not be perceived by the cake tester method.

Meanwhile, heat a small sauté pan over a medium heat. Add butter and, when melted, add the spring vegetables (if cooking carrots, add first before softer vegetables). Sauté until just soft. Add a sprinkling of thyme, salt and pepper. Taste and adjust for seasoning and cooking temperature. Remove vegetables.

When fish is finished steaming, add a generous tablespoon of butter to the warm sauté pan. When the butter has melted, carefully add one or two of the fish fillets (breading side down) to the pan. The point here is to quickly brown the bread, no more than 30 seconds to a minute. Carefully remove the fish and place on a warmed plate. Repeat with the other two fillets.

Spoon vegetables on the side of the warmed plates. Sprinkle the fish with Maldon sea salt and serve.

Should you decide to host a dinner party and skip going out for dinner altogether (despite the fact that there are plenty of restaurants out there willing to slash prices to get you in the door), this Alaskan Halibut is an excellent choice for maintaining calm in the kitchen as your guests arrive.

*Chefs are like pirates: they like danger, work odd hours, enjoy free time with an undeniable vigor, have fascinating stories to share and fire and sharp steel are their friends.

**This photo shows this dish made with Fregola sarda (a round pasta that resembles cous cous). I chose not to include prep for the pasta so as not to overwhelm!

Zuni Café Whole Chicken and Bread Salad Recipe


Zuni Roasted Chicken


Perfect Sunday Supper–Best Whole Roasted Chicken recipe

Great restaurants are beguiling, addictive places that create dishes so captivating that guests are rendered awestruck and wanting more. Great chefs—people like Keller, Achatz, Goin, Adria, Batali, Waters–can turn ordinary diners into devotees with just one astonishing, well-made morsel. Transformed diners are rendered helpless and willing to do anything to recreate those first orgiastic moments of consumption. Sometimes, these dish-craving regulars beg the chef for the recipe. Or, if the guest happens to frequent an especially popular restaurant, they buy the cookbook and pray that their skills are up to the task of recreating the dish of their obsession.

Then there are other times, when diners come to know a great chef via their cookbook first. In lean times such as these, cookbooks are a food lover’s best tool to getting to know the style and flavors of our world’s best chefs from the comfort of their own home.

Zuni Café Cookbook

Though I have never been to Zuni Café in San Francisco, I consider myself a fan. Not only are Chef Judy Rodger’s recipes easy to follow and well constructed, her cookbook is written to teach the reader how to think like a chef. Her words are clear, direct and always informative. Reading a Judy Rodger’s recipe is like going to cooking school, one recipe at a time.

Continue For the Zuni Café Whole Roasted Chicken Recipe »

Dinner with Infinite Fress

Black Cod at home

In my rule book, the sign of a great dinner party is a sink full of dirty plates and a table covered in empty wine glasses. Our dinner last night with Marisa and Steve, the lovely couple behind the erudite food blog Infinite Fress, was that kind of a party.

Self-admitted restaurant regulars (The chefs at Hatfield’s and Jitlada know them by name), Steve and Marisa know good food and aren’t afraid to criticize. Cooking for them would not only need to be good, but also needed to show them who I am as a fellow food blogger via my kitchen.

On their blog Infinite Fress, Steve and Marisa craft their true life food adventure stories and restaurant reviews with the care of a fiction writers. The food blog, built as an amusement for themselves and friends, has begun to collect something of a small cult following of hard-core Los Angeles food bloggers. Despite themselves, Infinite Fress is starting to get noticed.

I read a fair amount blogs (maybe too many, my husband would whisper) so it was rather surprising to realize that Infinite Fress may be one of the few (if only) food blogs out there that 1) doesn’t rely on food porn (or any photography for that matter) 2) has me reaching for a dictionary every few sentences. Infinite Fress may be text heavy, but I never want to miss the meaning of any of Steve and Marissa’s well-chosen words.

Dinner Menu

Using a favorite Dan Barber cauliflower recipe as a starting point for the evening’s meal, I found complementary ingredients that helped me create a meal that showcased my talents in the kitchen. To start would be a simple salad of fennel*, wild spinach and mixed grapefruit and nutty cow’s milk cheese. For dinner would be black cod, sauteed oyster mushrooms and cauliflower two ways. For dessert I would follow a Cafe Zuni recipe for chocolate pots de creme and put them in antique tea cups. My husband Hans visited the Wine Hotel for some inspired wine collections (thanks Dan! Thanks Paul!) and Steve and Marisa came bearing examples of two of their favorite wines.

The dinner, for the most part (I mistakenly shorted the dessert two egg yolks—creating a low fat and slightly milky pudding) came together without a hitch. The cauliflower steaks and the pot de crème were a big hit, but by far the most winning element of the night was the company. Steve’s hysterical food adventure stories had the four of us weeping in our wine glasses.

I enclose the following two recipes:

Black Cod at home

[print_link]

Cauliflower Steaks with Cauliflower Puree Recipe

Adapted from a Dan Barber recipe
originally published in Bon Appetit February 200
8

Makes 4 servings

The key to this recipe is to heating a heavy skillet on high heat and properly caramelizing the cauliflower. This is a recipe that is easily doubled when having a big dinner party.

Ingredients:
2 large heads of cauliflower
3 cups water
2 cups whole milk
4 tablespoons vegetable oil
1-2 tablespoons olive oil for brushing
fresh whole nutmeg, for seasoning
sea salt and white pepper

Preheat the oven to 250˚F. Trim the base of the cauliflower to remove the green leaves and part of the base of the cauliflower. Place the cauliflower root-side down onto the cutting board. Using a sharp knife, make two vertical cuts to cut away two one-inch steaks (cut from top to stem). Put steaks aside.

Cut the remaining fall-away florets into golf-ball sized pieces; this should measure about 6 cups worth. Combine florets, water and milk in a sauce pan large enough to fit the mixture. Sprinkle with salt and pepper. Bring to a boil and cook the mixture until the florets are very tender, about 10-15 minutes. Strain, reserving 2 cups of the cooking liquid. Spread the drained florets onto a large rimmed baking sheet. Bake ten minutes until slightly dry. Transfer florets to a blender in batches. Add about a half of cup of warm milk mixture to the blender and blend until smooth. Continue until all of the soft florets are blended to a smooth texture. Return puree to same saucepan. Taste for seasoning. If desired, add a fine grating of nutmeg to the puree for an additional flavor boost.

Increase oven temperature to 350˚. Heat 4 tablespoons of vegetable oil in a heavy, ovenproof skillet over medium high heat. Brush the cauliflower steaks with olive oil and sprinkle with salt and pepper. Place the cauliflower steaks in the heated skillet and cook until each side is golden brown, about 2 minutes on each side. Transfer skillet to oven and bake until cauliflower steaks are tender, about 10 minutes.

Divide puree equally and top each serving with a cauliflower steak.


*This recipe can be made in advance of meal. Re-warm puree over medium heat.

Chocolate pots de creme

[print_link]

Chocolate Pots (Tea Cups) de Crème Recipe
Recipe adapted from The Zuni Cafe Cookbook

Makes four servings

3 ounces bittersweet chocolate, coarsely chopped (save the extra for a garnish!)
1 half pint of heavy cream, ¾ cup for pot au crème the rest for whipping
¾ cup whole milk
2 tablespoons sugar
4 egg yolks
A good bourbon (or Calvados, Frangelico or Cointreau) (Optional)

Preheat the oven to 300˚

Melt the chocolate with ½ cup of the cream in a double boiler (a small metal bowl over a pot of simmering water). Stir occasionally, until the chocolate is melted. Remove from heat and set aside.

Warm the remaining ¼ cup cream, the milk and sugar in a small saucepan. Stir over low heat until the sugar has dissolved. Remove from heat.

In a medium bowl, whisk the yolk, then slowly stir in the warm milk mixture. Pour the mixture (through a sieve) into the melted chocolate. Stir to combine. Stir in a splash of your flavoring liquor of your choice.

Making chocolate pots de creme

Pour the mixture into four china tea cups and place them at least an inch apart in a baking pan or rectangular casserole dish large enough to hold the cups. If you don’t have tea cups use 4- to 5-ounce ramekins or custard cups. Add hot water into the baking dish (be careful not to splash water into the cups!) trying to get the water as high up as possible, without the water overflowing the baking dish. The hot water should come to almost an inch below the top of the tea cups.

Chocolate pots de creme fresh out of oven

Bake until custard is just set at the edges, but still quite soft in the center, about 45 minutes. To check, lift a tea cup and tilt it: the center should bulge. The eggs will continue to cook after you pull the custards out of the oven. The chocolate will harden as it cools. If the custard is already firm when you first check it, then remove the tea cups from the oven and set the cups in shallow bath of salted ice water to stop the cooking.

Cool, cover with plastic wrap and refrigerate. (They will keep for several days but are best eaten within a few hours of cooking!)

When ready to serve, whip the cream (do by hand with a whisk for a great arm work out or a blender for speed) until soft peaks form. Add a splash of bourbon to taste.

Before serving, sprinkle a pinch of Maldon sea salt onto the top of the pudding (believe me, you’re going to love it!), a hearty dollop of whipped cream and a fine grating of chocolate over the top. Enjoy!

*Marisa claims that this dish converted her from being a fennel hater.

Five-Spice Chicken Banh Mi Recipe

Vietnamese vegetable banh mi mise en place

All it took was one bite of Vietnamese food to turn me into a hungry student of the cuisine. That first mouthful inspired me with its hot, sweet, and spicy. Rice paper was a revelation. Fish sauce was a pungent wake up call. The perfume of a fresh kaffir lime leaf and lemongrass enchanted me and filled me with a desire to learn.

My first encounter with the cuisine of Vietnam was in the kitchen of a rocket scientist who lived in the neighboring town of Cambridge, Massachusetts. My friend Mark was a smart guy who loved to travel the world for science and food. The aromas emanating from Mark’s kitchen were unfamiliar. The pot on the stove—the source of all that I smelled—was covered to hide its contents. There a book-marked copy of Mai Pham’s “The best of Vietnamese and Thai Cooking” perched on the nearby counter.

I was in my mid 20’s, living just a short drive from my small town, and knew almost nothing about Asian food cultures. My knowledge went as far as what to order at the local sushi restaurant and Chinese take out spot.

“Close your eyes,” Mark said. He spooned a bit of the soupy broth from the splattered stove top.  “Taste.”

The high-note spices, the sweet aromatics, and the delicate textures left me speechless. What was that flavor? Pumpkin? Coconut? I was in the thick of a culinary awakening.

Soon after this experience, I got the news I was accepted into film school. I packed my bags for Los Angeles, but just before I left, Mark gave me my very own copy of Mai Pham’s cookbook. That cookbook became my passport to food exploration and, eventually, a bridge to cherished friends. My copy is colored with more than a decade’s worth of experimenting.

My Five-spice Chicken Banh Mi is truly is happiness on bread.

Continue for my Five-spice Chicken Banh Mi Recipe »

A Recipe for Becoming Guatemalan

mixtas

Yo soy pura gringa. And yet, thanks to my husband, I am part of a beautiful Guatemalan/German family.

As a food lover and newly initiated family member, I thoroughly enjoy learning the histories of my husband’s family through food. Standing at the stove with my mother in-law, I discover the heritage dishes of the generations before and relish the bright, fresh flavors of comfort food from Guatemala.

In any culinary journey, the key to discovering the nuances of an unfamiliar territory is through comfort food. But eater beware. Once sampled, another culture’s comfort food has the power to beguile, distract and–most impressively–require further in depth exploration. One bite and suddenly you’re filled with a longing for that comforting flavor that can match the craving of the people that have been eating it all their lives. Tasting Mixtas for the first time, I suddenly wanted to hop a plane to Guatemala.

Mixtas, known as Guatemalan street food, is more than just a hot dog on a tortilla. Made with fresh and inexpensive ingredients, the mixtas is a hot dog rolled up with a refreshing lime-dressed cole slaw, delicate guacamole, green chiles and spicy hot sauce. A perfect mid day snack or late night bite on the cheap, a mixtas makes you wonder why you’ve never had a hot dog soft taco before.

mixtas

[print_link]

Mixtas, or the Guatemalan Hot Dog Taco
From a Family recipe

1 package of fresh tortillas (corn), heated in microwave in a towel or warmed over gas flame of stove
1 package of hot dogs (beef or pork), cooked in boiling water
Guatemalan slaw (recipe below)
Guatemalan guacamole (recipe below)
Hot sauce (Tapatio or Sriracha)
1 can of green chili

Guatemalan Slaw
1 bag of shredded cabbage “angel hair” style (or thinly slice half of one cabbage)
Juice of one lime
2 tbs chopped cilantro
1 Red onion, minced
4 tbs Olive oil
Salt and pepper, to taste

Toss shredded cabbage with the juice of one lime, chopped cilantro and minced red onion. Drizzle with olive oil, enough to just coat the mixture. Season with salt and pepper.

Guacamole de Antigua

2 ripe Haas avocados
¼ red onion, minced
½ small lime, juiced
1 teaspoon of dried oregano
pinch of salt
1 can of green chiles (optional)

Remove meat of the avocado and mash with a fork in a bowl (or on a plate!). Mix in the red onion. Squeeze the juice of half a lime over the mixture–the citrus not only flavors the mixture it keeps the avocado from turning brown. Rub the teaspoon of oregano in your hand to release the herb’s oils and then add to avocado mixture. Add salt to taste.

To make mixtas:

Boil hot dogs in hot water. When done serve on warm tortillas (double up the tortillas if you prefer) with slaw, guacamole, hot sauce and green chilies.

Enjoy!

Coffee-Braised Bison Shortribs: A Low Fat Indulgence

Braised bison short ribs

Have you ever noticed that soon after learning a new word, or becoming interested in the latest subject matter, you begin to see signs of that new thing everywhere? You overhear people talking about it. Read a headline focusing on it. See a photo of it on the side of a bus. You do a double take–did everyone know about this thing but me?

Sometimes finding a new ingredient is like that, too. You become excited about the item–feeling uniquely able to uncover the ingredient’s culinary possibilities–only to discover everyone around you talking about how they ate it, cooked it, or shopped for it. You realize you’re not alone in your discovery. Either everyone else has just learned about The New Great Ingredient, or your culinary discovery is more a coming-to-your-senses moment.

Bison is my New Great Ingredient. After a lifetime of never cooking, eating, or even seeing bison, I suddenly see signs of bison everywhere. There are bison burgers on the menus of burger joints all over Los Angeles. Iron Chef’s battle with bison as their secret ingredient. Bison vendors sell their vacuum packed meat to lines of dedicated farmers’ market customers. Magazine articles extol the virtues of bison’s low fat, high-protein nutrition profile. Though bison may be one of America’s original meat sources, the industry seems to be breaking through to a nation of meat eaters like me, that are interested in healthier and low-fat alternatives.

Suddenly, I’m very interested in bison. And to tell you the truth, I’m craving the stuff.

Continue for a Super Easy Coffee-Braised Shortrib Recipe »

Prosciutto Wrapped Scallops: A Recipe from Alice Waters

After some seven months of posting recipes and food reviews, I was pleasantly surprised to receive a culinary request from my filmmaker-friend, Jesse:

I have a question to ask you: I’ve started hosting these little soirees at my house lately- a small group of intellectuals and artist types, who come for an evening of frolic, food and film. I pick a film that most of them have not seen or not seen in years, and design a meal around the film’s locale or origin.

We started with “Big Night” and I made timpano. Then we did a Chinese evening with “The Last Emperor” (my 2nd favorite film…”City Lights” is still #1 in my heart). And for my next eve, we are hitting the streets of Paris, with a George Roy Hill film I’ve always loved, “A Little Romance,” starring a young Diane Lane and an old Laurence Olivier.

For the menu, I’m thinking “Paris Bistro”…but am having trouble coming up with ideas for courses. So I thought you might have some suggestions?

How exciting! A request for MY food advice?! Hooray! My food blogging has paid off! Someone values my culinary advice! Sure, Jesse is a good friend…but a food blogging person has to start somewhere. Right?

Being one to respect authority when it’s given to me, I decided to do some serious research. After much cookbook reading, I felt it best to turn to one of our country’s greatest culinary icons: Alice Waters. Since the early 70’s, Waters and her Chez Panisse team have created mouth-watering dishes inspired by the French Bistros she visited as a college student. At Chez Panisse Café, the simple dishes are thoughtfully prepared from fresh, local ingredients that are either foraged from local environs or purchased from nearby farms.

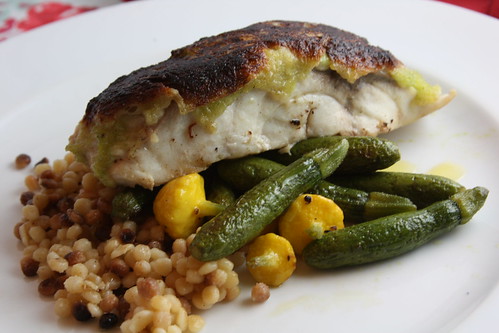
The following dish is an incredible example of how fresh ingredients, when paired well, can create a memorable bistro dish made only from a handful of simple ingredients.

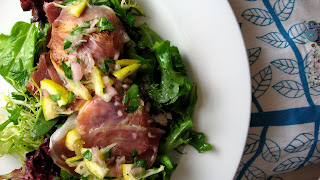
Baked Scallops with Proscuitto and Lemon Relish
Adapted from the Chez Panisse Café cookbook

Ingredients:

1 pound medium-sized fresh sea scallops  Note: the scallops I bought were big enough to serve 2 scallops each (which are about 1/8 lb each). You may choose to cut big scallops in half—thereby creating the visual effect of a “larger portion size”

3 tablespoons extra virgin olive oil

6 – 8 slices of Prosciutto

Handful of young greens (lettuce, cress, rocket or mache)

Few drops of red wine vinegar

Salt and Pepper

½ cup Lemon Relish*

Preheat oven to 475 F.

Remove the tough “foot” from each scallop. Season with salt and freshly ground black pepper.

Heat a cast-iron pan or a heavy, oven proof skillet over medium high heat. Pour in about 2 tablespoons of olive oil or enough to coat the bottom of the pan. When the oil is nearly smoking, add the scallops in one layer. As soon as the scallops begin to sizzle, place the uncovered skillet on the top shelf of the oven.

Check the scallops after five minutes. They should be nicely caramelized and firm to the touch. If the top portion is not yet golden colored, gently flip the scallops with a fish spatula in order to caramelize the other side. Cook for an additional 2-3 minutes, or until caramelized. Remove from oven.

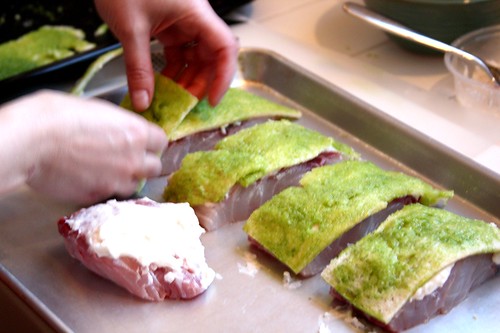
Drape the prosciutto slices over and around the scallops.

Quickly, put the handful of greens in a small mixing bowl and lightly drizzle with a touch of olive oil, red wine vinegar, salt and pepper. Toss by hand. Add individual portions of seasoned greens to each plate and then arrange the prosciutto wrapped scallops on top. Spoon a small amount of Lemon Relish over each serving.

Note: You may want to serve one perfectly wrapped scallop as a delicious first course, or a few as an incredibly satisfying main.

*LEMON RELISH
Adapted from the Chez Panisse Cafe Cookbook

1 large shallot, diced fine

1 tablespoon red wine vinegar (or lemon juice)1 large lemon (if Meyer lemon is available use it!)

1/2 cup extra virgin olive oil

2 tablespoon chopped tarragon

Salt and Pepper to Taste

Put diced shallot in a small bowl. Add vinegar and a pinch of salt. Let macerate for 10 to 15 minutes. Cut lemon into 8 wedges. Remove the seeds and white pith from center of each piece. Cut across the wedge into thin, triangular slivers. Combine the slivered lemon and shallot and add more salt. Stir in the olive oil, parsley, tarragon and some freshly milled pepper. Taste and adjust for seasoning.

Spoon relish on top of prosciutto wrapped scallops.
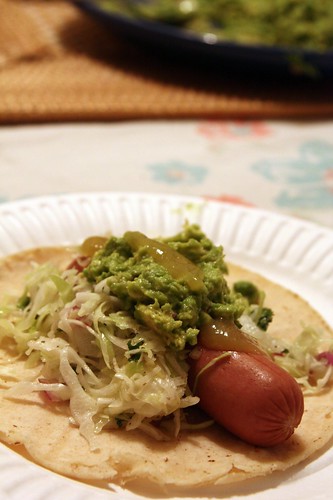
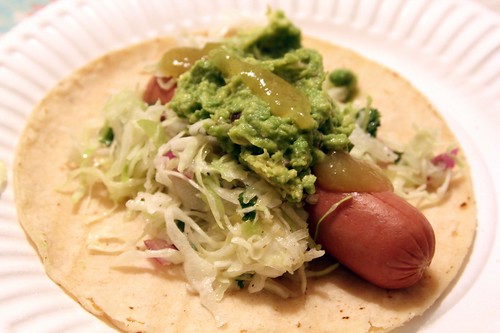